


Don't Miss a Thing!
Get the latest articles, recipes, and more, when you sign up for the tasteforlife.com newsletter.
Trending Topics
Hot Product
America’s Finest Boswellin and Curcumin C3 Complex
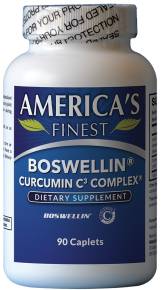
America’s Finest Boswellin and Curcumin C3 Complex are powerful antioxidants supporting joint function and relieving temporary joint inflammation that may occur after physical activity overexertion.